


📽️ Video URL: https://www.youtube.com/embed/nNZx_2RJAvk
To disable ReSharper in Visual Studio, you should take the following steps:
- Access the Top Menu.
- Select the Tools Tab and choose “Options” 🔨.
- Click “Options” and a new window should appear.
- Find Resharper Section (you can use the search input to filter the results) and navigate to “General”.
- Click the “Suspend Now” button to disable ReSharper.
- Finally, confirm your changes by clicking the "Ok" button.
Disabling ReSharper in Visual Studio
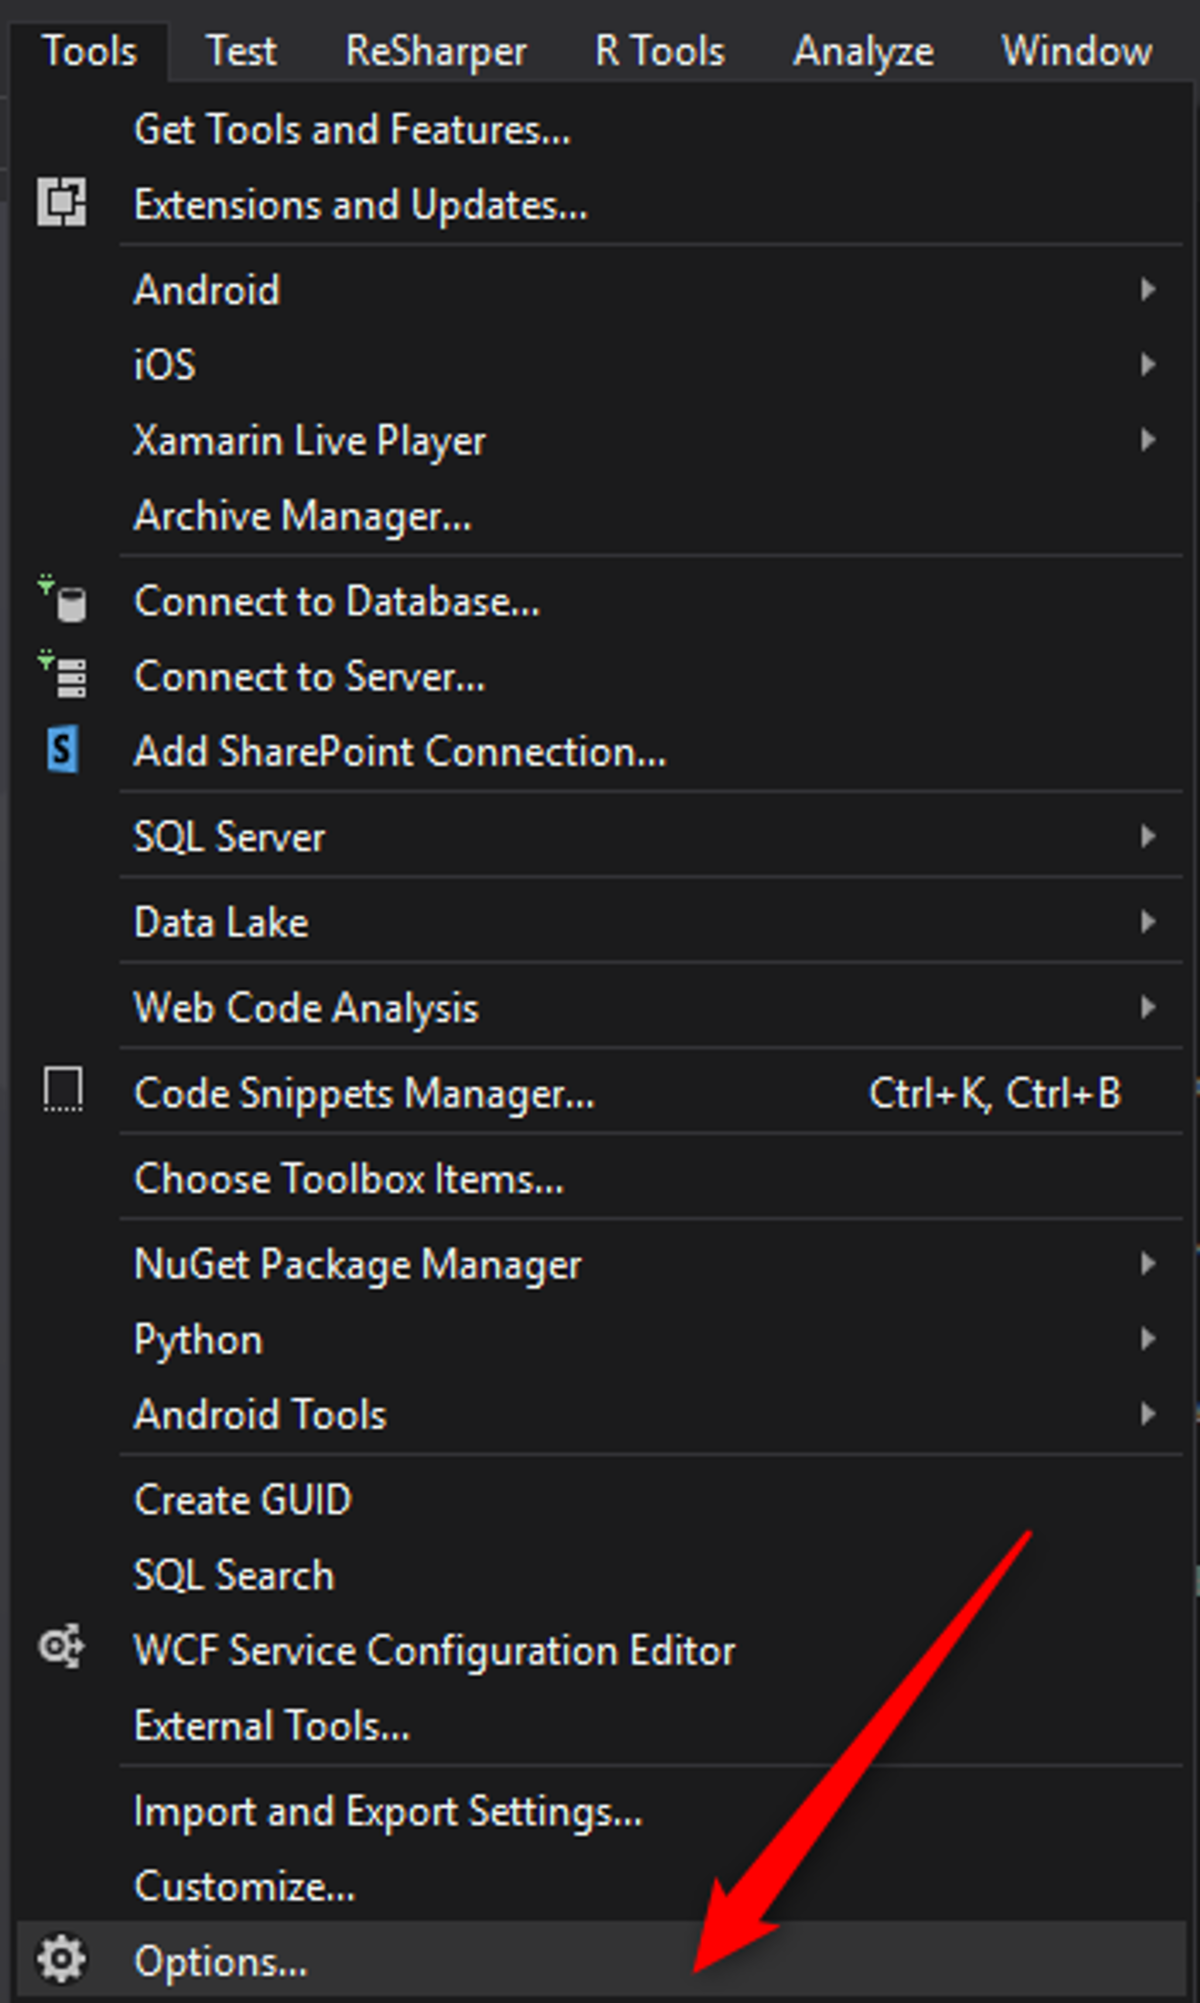
Visual Studio > Tools > Options
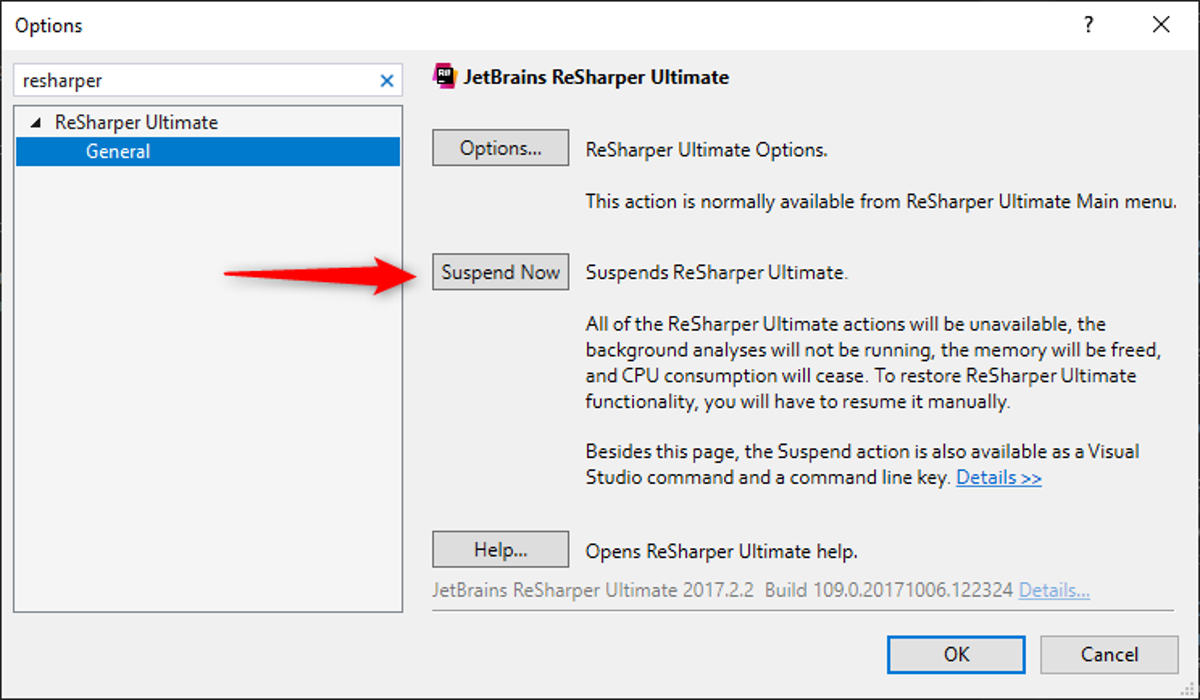
Visual Studio > Tools > Options > ReSharper Suspend Now button
Enabling ReSharper in Visual Studio
To re-enable ReSharper in Visual Studio, simply use the "Resume Now" button after it has been disabled. This straightforward action turns ReSharper back on.
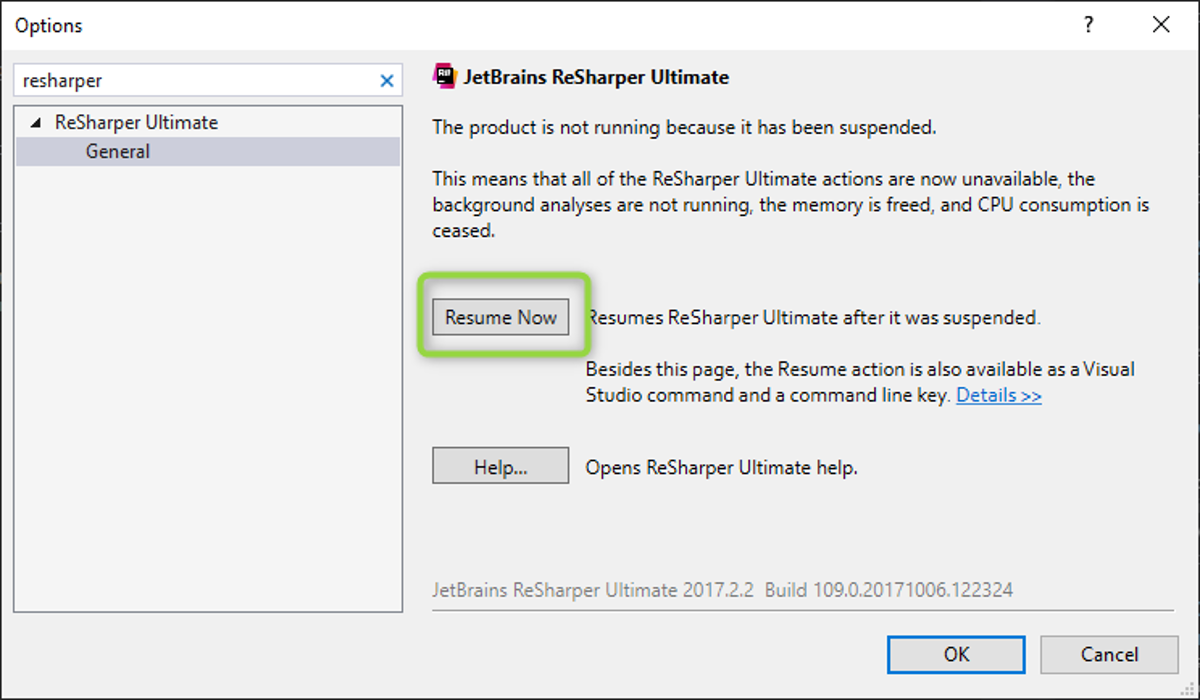
Visual Studio > Tools > Options > ReSharper Resume button
Final thoughts
Disabling ReSharper in Visual Studio can significantly boost performance, as it's known to slow down the IDE.
This is crucial for developers managing a demanding coding environment.
By suspending ReSharper, you free up resources, allowing Visual Studio to run more smoothly and efficiently.
Re-enabling it is just as straightforward when needed.
Understanding how to toggle this tool effectively is critical in optimizing your workflow.
For more insights and .NET articles, explore our blog for valuable information.